In a world of Instagram, traveling, and travel blogging, it seems we’re taking more pictures than ever before.
Yet I chuckle when someone sees me shooting while traveling or finds me online and asks me, “Are you a professional photographer?”
Some days I want to stretch the truth and say yes, because I have made money from my photos before. Does that a professional make? Not in my eyes.
So I spill: “Actually, most of the time I shoot in auto.” I then get one of two looks: the “wow-that’s-amazing, your photos still look good” or the “silly little travel blogger, you’re not doing it right.”
The truth is, most of my photos do turn out decently well in auto mode. For me the tradeoff has always been time, since I’m not yet comfortable shooting in manual on the fly. When I’m traveling (or just living,) I try to balance the time I’m behind a lens with the time I’m enjoying the moment with my own two eyes. Taking the time to adjust otherwise seemed like an awful lot of effort with minimal payoff, seeing as I’m already decently happy with my photos.
Enter Patrick Kelley.

Photo by Brad Bernard
Patrick has an inspiring career story (as well as being an all-around great guy.) Patrick has always studied photography — he even holds a degree in it. By trade he shot commercially for General Mills in his home state of Minnesota. He rose to the top quickly. It was, in his words, a comfortable, secure job in a coveted role. How many people do you know that have a corporate job and still get to make art in it every day?
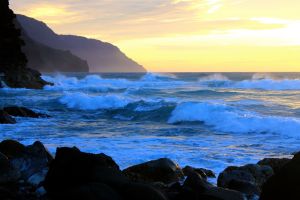
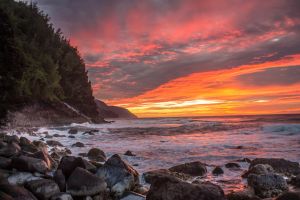
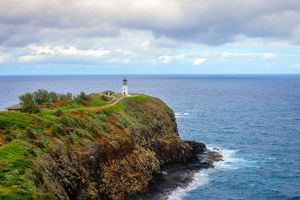
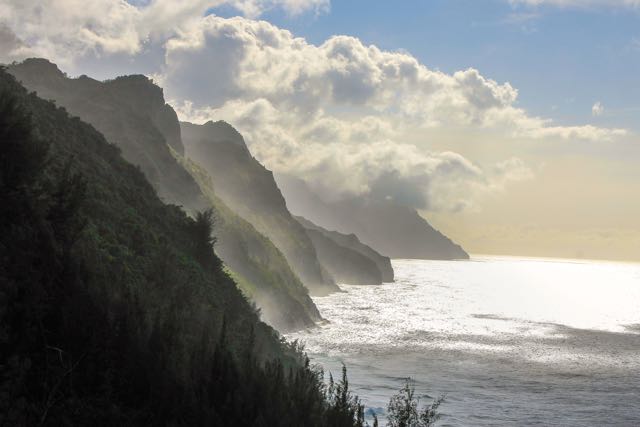
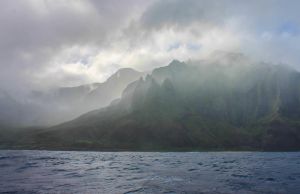
One year Patrick won a photo competition that took him to the island of Kauai for a week. He found endless inspiration in the natural beauty of the island. After returning to his job and a cold Minnesota winter, something shifted.
Brad of MyWanderlist and I met Patrick on Kauai earlier this year, where he now runs Kauai Adventure Photography Workshops (KAPOW!) All of us were individually inspired by a mutual friend who shares our story and connected us all (Sherry Ott of Ottsworld.) The three of us bonded over many of the same joys and challenges of leaving a corporate career to pursue your dreams —
Dreams that mean living in your ideal place, running your own business, and of course, travel.
Patrick took us to some of the coolest spots on Kauai, both for photos and for adventure. He challenged me to step up my photography game. (The guy has won National Geographic photo competitions.) He made ‘getting out of auto’ less intimidating. Best of all, he helped me see that a few simple steps before, after, and during the photography process really make a difference in final image quality.
It’s easy to get caught up on the complication of all the factors that enhance a photograph. I often get bogged down in the “bells and whistles” of my DSLR camera…
Here is my simple, boiled down version of what I learned (and am trying to stick with:)
Improve Your Travel Photography
[box]
Shoot in RAW and get off auto.
Use a tripod.
Edit them. [/box]

To slightly expand upon that:
- Shooting in RAW (especially landscapes) will require a much larger SD card (trust me – the image file sizes are huge!) but you’ll have one major post-production tool you can’t get with a JPEG…adjusting the white balance!
- And while I don’t do it all the time, shooting in RAW has taught me to be more selective about the photos I take, edit, and store. (Sometimes it’s more overwhelming to have so many digital images to choose from after.)
- Tripods are also a great way to take pictures of yourself while traveling solo. I see them as the anti-selfie stick. (Just say no to selfie sticks.)
- As far as editing goes – so many times I think I’m happy with a shot but if I take a little extra time to adjust highlights and shadows or color to better represent what I actually saw…I’m much happier with the outcome.

A few more key tips!
Pay attention to the light. I’m all about composition, but it was a game changer for me to start paying attention to how I could best capture light or best lighting in a photo.
Take 10 seconds to reframe your shot. Again, it’s easy to get crazy here with all the possible angles and poses. The one tip I try to live by is to take the shot as I first see it, then take ten seconds to try something different. Some of my favorite shots come about this way, just by simply looking for something different with intention.
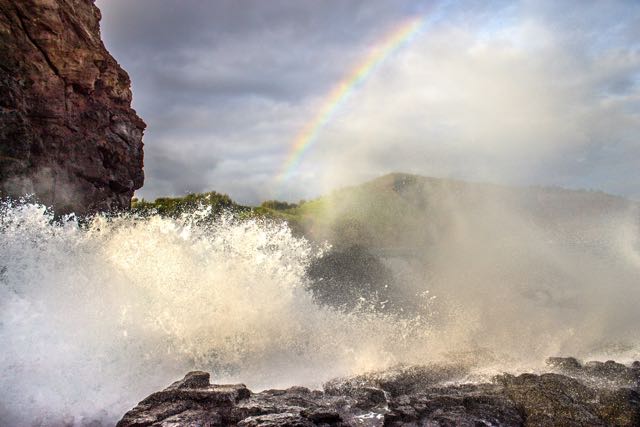
Play with the light. I might be letting my amateur flag fly here, but I had no idea until I worked with Patrick that you could literally play with light and say, in a 30 second exposure night shot, take a flashlight and illuminate something in the shot that would then be highlighted in the final image.
If you’re shooting something popular or common (sunsets, the Eiffel Tower) take a step back and think about how you could shoot it from a new perspective. (This came from Sherry Ott, who is also an amazing photographer!)
Other Notes!
- Practice makes perfect (sort of.) Don’t get hung up on the details. It’s supposed to be fun. No photo is perfect! That being said, the more you shoot the better you’ll be.
- If you’re not comfortable with manual mode, try shooting in Av (Aperture priority) where at the least you can control the ISO (important!) In most instances you’ll want your ISO to be as low as possible, either 100 or 200. You’ll see a huge difference in the quality of your images (less grainy!) Av is also the best way to control depth-of-field.
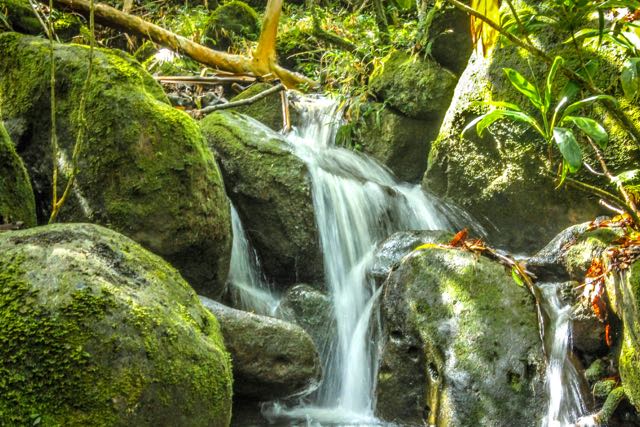
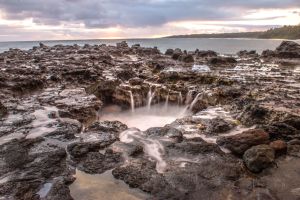
- When you’re wanting to control movement, try Tv (Shutter priority.) One of the things I’ve learned is that shooting waterfalls with longer shutter speed in this mode creates that stunning water flow we all want to achieve. You’ll always have to play with the settings here (depending on water flow and speed) but I find starting with 1/10 is a good place to start.
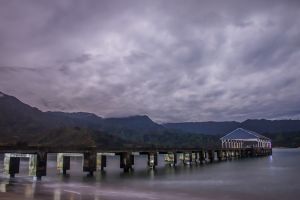
- Night shots! Oh, you’ll definitely need that tripod. The advice I’ve gotten is to shoot with a 30 second exposure (to let in as much light as possible) but you’ll need to stay extremely still for the image to come out crisp. You’ll also want the lowest f-stop setting and to adjust the ISO according to the amount of moonlight.
- Some images look good with a vignette (add in post-processing) and it can be a useful tool to focus the attention of the eye.
Lastly (most importantly!) Editing should enhance a photo to be more like it looked in reality, with your own two eyes. I see so, so many over-processed travel images and some are beautiful…but I just want to shout, why why why! It is my belief that if you process a photo, it may be beautiful but it’s not real. Call it stubbornness or a request for authenticity, but especially when trying to capture a person or place in travel…we don’t want it to be misrepresented. Editing is an important tool of conveying what you saw, not twisting into fantasy (just my own humble opinion.)
If you want to learn from Patrick as well, he offers his photography workshops in both a group and one-on-one setting. (Highly recommended.)
PS: Many of you asked, so…
Here is my travel photography gear!
My Camera // UV filter // Favorite Accessory // Travel Tripod // Remote // SD Card
Great tips and beautiful photos! I currently own a Sony mirrorless and am so intimidated by all the different options and settings. But this boils everything down and makes me a bit more excited to shoot.
Ahh that’s the next camera I’m looking at getting! Nice and small. Glad the post helped!
Great tips! Just got to go out and get a camera that shoots raw and a trip pod now.
I take many cool photos on my phone! But yeah, having those as tools for the right setting will definitely step up your game 🙂 Best of luck!
Oh I have so much to learn and a long way to go. These tips are very helpful.
Glad it was helpful, Heidi! I still have a long way to go as well, but it helped me as well to share these things I only very recently learned!
Do you have any tips on editing software to use?
Hi Cathryn,
I use Snapseed on my iPhone and Lightroom on my laptop. Snapseed is pretty intuitive, whereas Lightroom takes a bit of an investment to learn. I hope this helps.
Happy photographing!
Fantastic! Thank you 🙂
You’re so welcome!
Anne, have just added you to my reader — very excited to be able to easily follow your posts 😀
This is a great post, and even more amazing photos. I will be sure to bookmark Patrick’s info for my next foray to Kauai; I was there in Feb 2014 and it was beautiful but your photos sell me on it all over again! Thanks for the great tips!
Aloha Valerie! Haha. I’m glad you found the tips helpful! It’s hard to imagine a more beautiful place to photograph, but it is also one of the places I found most challenging to represent its actual beauty in a photo. This is where the editing and extra thought come in!
I’ve just started getting into photography so most of what you said is Greek to me, the techie stuff. But the rest is really helpful so thanks for posting. Nice interview over at TBS. I love that you put out there about not looking at stats and having a home base with part time traveling.
Hi Tricia! Sorry about the Greek! I really appreciate the comment, and I’m so glad you enjoyed the interview. I do a few things differently, so I appreciate the encouragement to continue down the path and I’m so glad you can relate.
Best of luck photographing and hope to hear from you again soon!